Hot Patterns – Classic Nouveaux Great White Shirt Pattern Review
Hot Patterns have become very popular recently and I have been curious for a while so I took the plunge recently and purchased this classic shirt pattern. I purchased my pattern from Susan @ Sewbox.

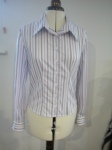
Hot Patterns Classix Nouveax – Great White Shirt
In Sudbuy we have two silk mills one produces couture silk for the dressnaking and couture fabric retailers and the other produces for the soft furnishing market. Last year I happened to pop in to the courture mill and found the most fantastic offcuts of mens shirting, so I had to buy them – well you would wouldn’t you? They were a bargain so I had to have them. Anyway I digress, here is my account of the pattern.
Hot Patterns come in large almost A4 size packets, when you open the packet you see why. The pattern is printed on normal 90gsm paper so like photocopy paper. There are two sheets of instructions included but interesting no diagrams to assist you, just text descriptions.
I decided to make this shirt on a blouse course at Alison Victoria School of Sewing in Ashby De La Zouche so I put the pattern in a bag with my pressing cloth and the main fabric. When I took the fabric out a few days later some of the ink from the picture on the envelope came off onto the pressing cloth, so it appears to be ink jet of some sort rather than lasered and therefore not colourfast. Apparently this is a known issue with Hot Patterns. (If you’re reading this Jeremy please can you do something about it, it could have leaked onto my bargain fabric!)
Sizing
This pattern comes in varies ‘style / shapes as well as sizes so I am using the slinky girl size 10. The waist and hip sizing are 1/2″ less than mine but the bust is a 36 whereas I am a 34, which I believe to be more in proportion with the hip and waist from the pattern for a size 10.
Cutting out
There are no size (e.g. 10, 12, 14) numbers on the cutting out lines like standard pattern.
The paper pattern and instructions do not include pattern layouts for fabric placement. So this assumes a certain level of knowledge. As this is one of the hot pattern patterns that is not indicated for skill ability it could be picked up by a beginner as a classic style and I believe that they would struggle with this.
Comments on the individual pattern pieces
Blouse Front
This blouse has side bust darts and full length front darts. If you have a small bust like me (b cup) then making up the side dart, which is really big, will make the blouse sit wrongly across the bust.
We decided to slightly shorten the underbust dart and make it about 1/2″ wider at its widest point and omit the side bust dart. This makes the blouse fronts longer than the back by the same amount as the fold in the side bust dart, which for myself is 6.5cms but takes away the prominent and oversized nipple point that occurs if the side dart is kept in. (Madonna pointy bust!) Bear in mind that my bust size is a 34b and the size 10pattern bust size is a 36″ with no reference to cup size. (this is where I feel that the bust size is out of proportion with the waist and hip for a ‘slinky girl figure.’ The result is that the fronts will now hang 6.5cms longer than the back and thus will need to be shortened by 6.5cms following the curve of the bottom edge.
Having made the following alterations for my fit the blouse fronts hang beautifully and I am really delighted with the fit. The extra long front and back darts really give a definition to the shape of the blouse and the contours fit my ‘slinky body’ perfectly. The back also has long darts from lower shoulder blade to hem to compliment the shape along with a shape centre back seam which attaches to the yoke.
I love the flexibility of the pattern to be able to choose between a pleated back and and a darted back. It would also be possible to achieve a semi-fitted look by omitting all of the darts on the front pieces due to the curvature in the side seams and centre back seams alone. A really lovely feature.
Side bust darts
I found the pattern piece for this slightly confusing. The dart is drawn using size lines and it would be very easy to for a novice to cut along these instead of realising that one is a fold line and one is a placement line. Also there are no instructions for sewing this dart and it almost appears to have been forgotten and or overlooked.
The style description at the top of the instruction sheet indicates that the side bust seams are the main dart seams but this will only work if your measurements are the same as the pattern for bust waist and hip. I estimate that the bust size for this pattern will be a minimum of 36C for the side bust dart alone to produce the desired blouse shape.
Yoke
I graded the seam allowance so that there would not be a bulky seam, this would be a useful additional instruction, particularly with heavier fabrics.
Seamed back
The back darts are again optional but I included them to allow for my slight sway back. Once joined with the yoke and the altered fronts the overall fit was fantastic!
Side seams
The overall fit is quite fitted around my waist and hips. So if this were to be a blouse over a thick pair of trousers e.g jeans, then it might be better to put a slit into the bottom of each side seam. Over a linen pair of trousers or skirt the blouse would hang beautifully.
Sleeves
Lower sleeve slit
The method that they have used to create the opening on the sleeve is one that only advanced sewers would use. They cut an upside down v shape but we decided to do this slightly differently. We cut the slit straight up the middle of the V ( rather than cut the V shape out). Then cut a bias strip of 3.5cms x 20cms for each sleeve V and stitched this onto both sides of the slit with a ¼” seam. The other edge of the bias strip we pressed in ¼”, then folded the bias strip to the inside and hand stitched into place. I decided not to edge stitch the bias strip. This resulted in a really nice ‘placket around the edge of the opening at the bottom of the sleeve.
The cuff
These were meant to be double cuffs with cuff links which I had intended to make. Having thought about the type of shirt I usually wear I decided to just do a single cuff. The cuff thus was adapted to fit the end of the sleeve, but the instructions for the original double cuff were clear and would have worked well.
Inserting the Sleeve.
I elongated the gathering around the sleeve head so that it started and finished at the same distance from the underarm sleeve on each side. I find that this produces a more even fitted sleeve. The instructions also tell you to fit the sleeve as a flat fabric onto the garment before sewing the side seams of the blouse. I didn’t get a satisfactory finish when trying this so I made the sleeve up and sewed the back and front together and fitted the sleeve in using 2 rows of machine gathering to ease the sleeve head into the armhole.
Buttonholes
As with all blouses I ignore the buttonhole markings so I’m not sure if these are in the correct place or not for me. (you put the blouse on and pin where you want the fullest part of the bust to be closed. This stops any gaping and then spread the buttons out evenly after this.)
Other comments
Pattern paper is proper paper which is great for durability but not do great for assessing / forming sleeves out of the pattern paper itself. Tissue is more malleable.
Front Placket / Buttonhole bands.
These are quite wide which is fine, but the collar placement on the collar stand comes too close to the end of the stand and did not provide enough space for the top button. As I wanted to make sure the stripe pattern flowed from one side to the other across the front this meant that I had to overlap the buttonhole plackets over more. Even without doing this to suit my fabric there would not have been enough room for a button at the top of the shirt on the collar stand. (that’s the one right at the top where a man would have his tie.) So next time I am going to slightly shorten the upper collar and make it do up to the top.
I love this shirt and will definitely make a load more. Now I have the pattern altered to suit me it’s a no brainer!! I’m going to keep the front the same and use the pleated back to give a slightly more casual shirt and see how that works.
Level of competence required to use hot patterns
Personally I think you need to have some understanding of pattern drafting to really understand the markings on the pattern and definitely an understanding of layout, naps and pattern positioning in order to understand how to achieve the overall design. I would suggest a level of advanced intermediate sewer for this pattern.


-

- Hot Patterns Classix Nouveax – Great White Shirt
Hot Patterns have a really good page on their website with some great advice on preparing fabric and how to use their patterns I’d love to hear your experiences with Hot Patterns, I like them and have a few more to try out yet.
Happy Sewing
Sewing Mad
- Posted in: Pattern Reviews
